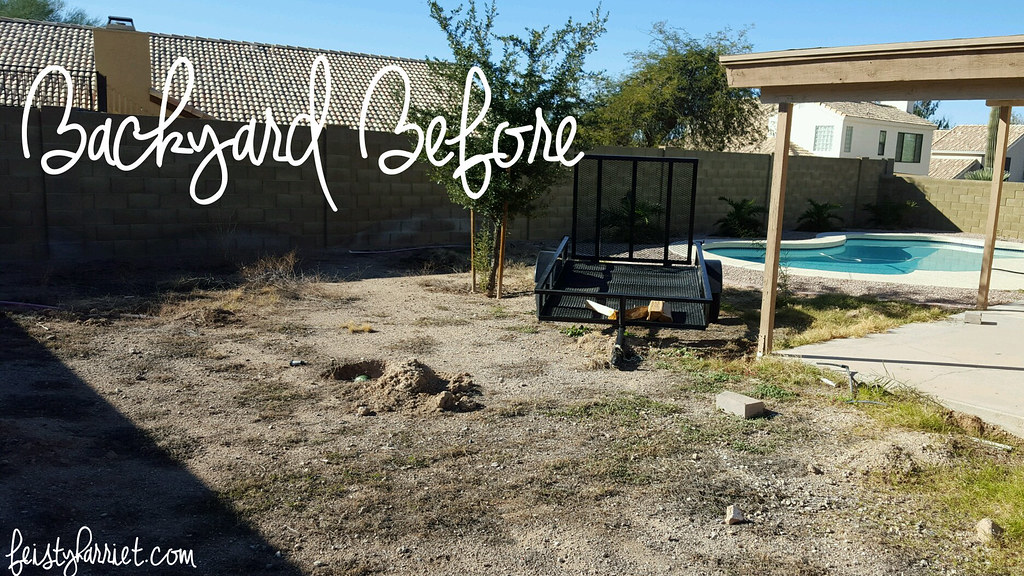
When Blue Eyes and I moved into this house the yard was kind of a disaster. Whoever lived here prior to us moving in was, well, generally pretty disgusting. The house had been empty for over a year, and whoever flipped it didn’t do a super thorough job of getting rid of the grossness. In the yard, they decided to just put gravel in most places, with one very VERY sad palm tree in the front yard, and a couple of new palmy-frondy plants in the back. The real estate listing photos mostly showed a newly cleaned and possibly resurfaced pool, the rest was literally just crushed rock. We have a lot of property, but with this kind of, um, “xeriscaping” it was completely unusable.
Prior to tackling the backyard (the front yard will be next year…or the year after) I did a lot of research on different types of trees and plants that do well in the blistering desert heat, and how to keep flowers and vegetables alive through the endless summer. I also decided to look at Google Earth and see if there was any evidence of what the previous family had as far as landscaping.
Um….that was a mistake. Our yard was, without question, the grossest one in the neighborhood. The gravel that I really dislike is a step up from the scruffy dirt and weeds and the drained, yellow-puddle-left-in-the-bottom swimming pool.
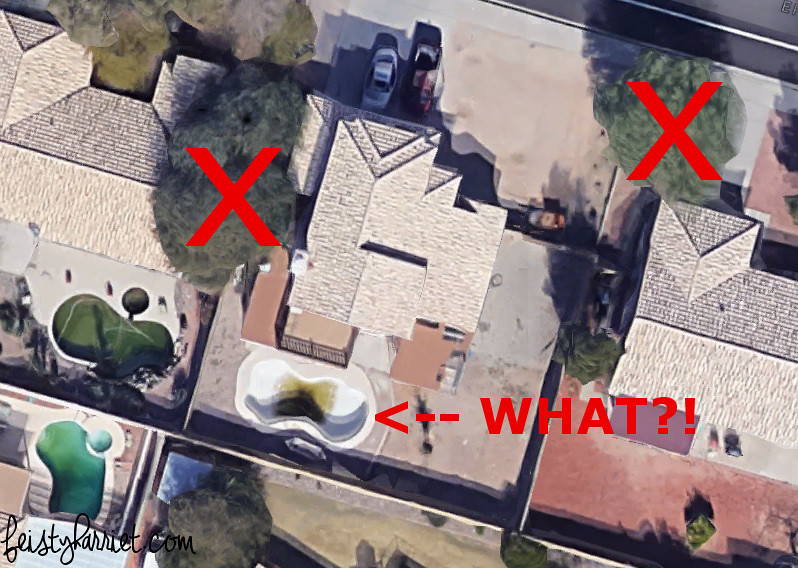
Yep. The worst in the neighborhood. There are a couple of enormous shade trees in this image that have all been cut down for reasons I cannot imagine. WHY!? STOP GETTING RID OF SHADE TREES! THIS IS THE VALLEY OF THE SURFACE OF THE SUN! SHADE = NECESSARY!!!
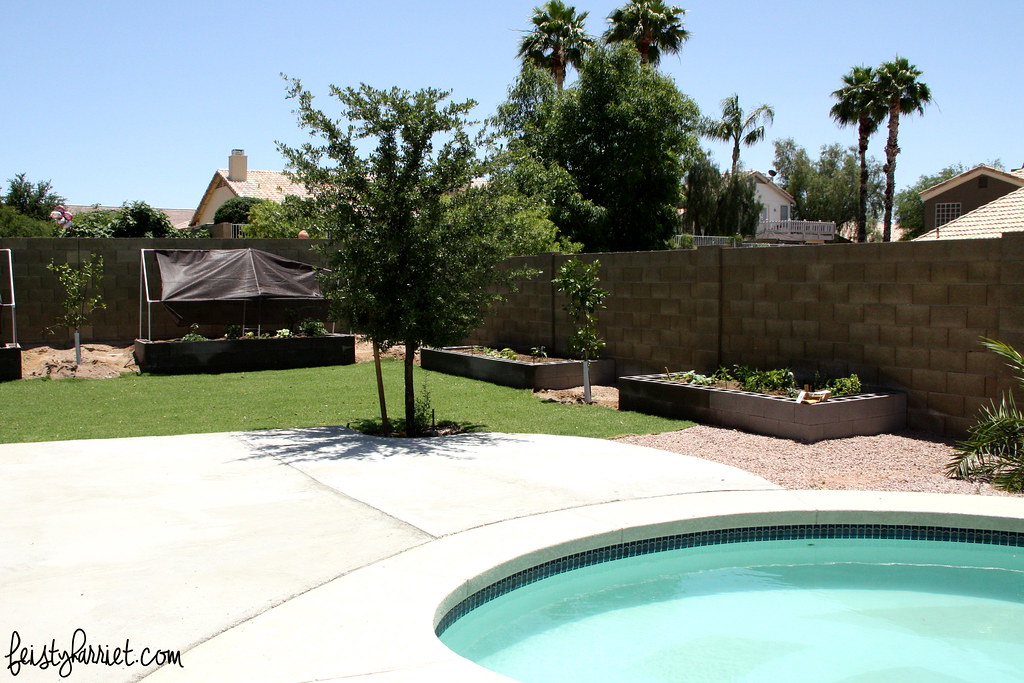
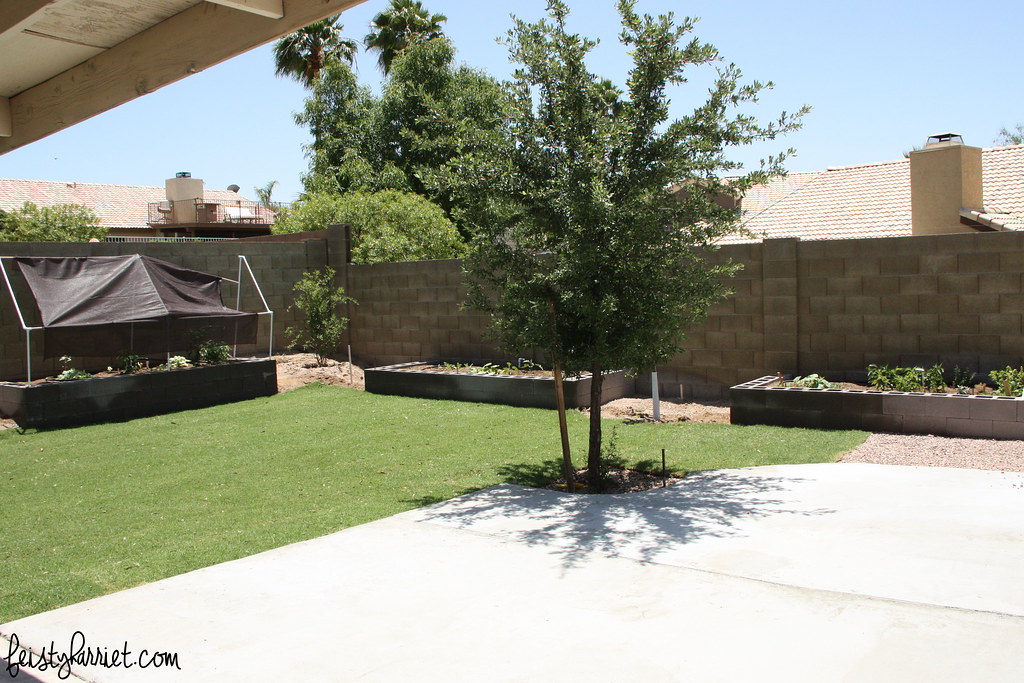
Blue Eyes and I definitely had our work cut out for us. We went back and forth on the backyard. He wanted low maintenance, I desperately wanted a patch of grass. Without it, I knew I would never go outside. We compromised with a small patch of grass, several raised boxes for vegetables and what-not, a new patio, and a handful of trees.
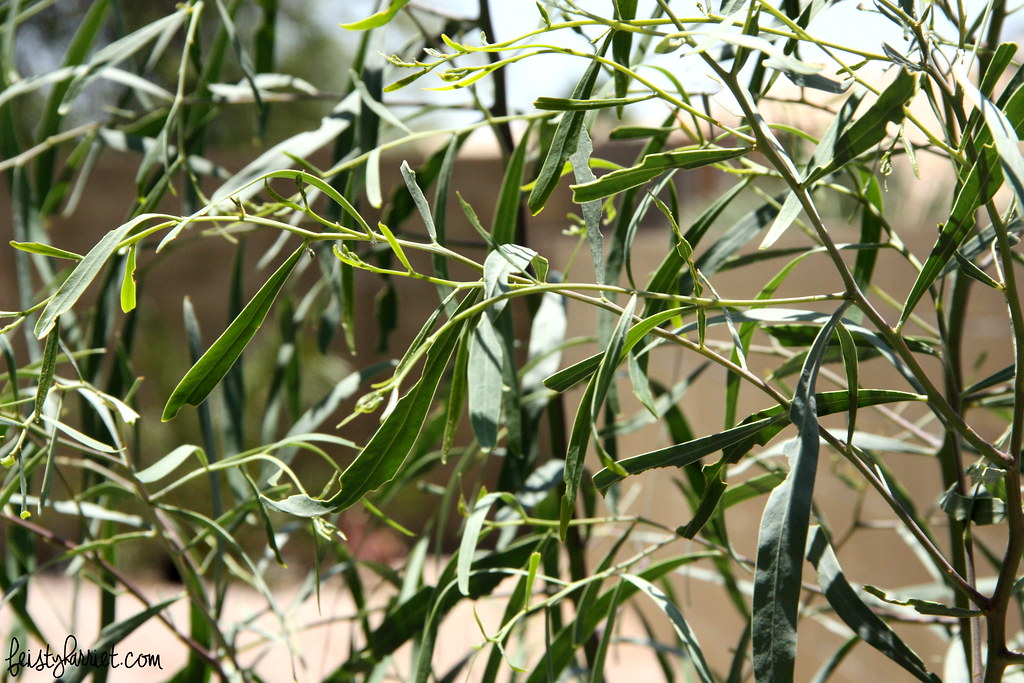
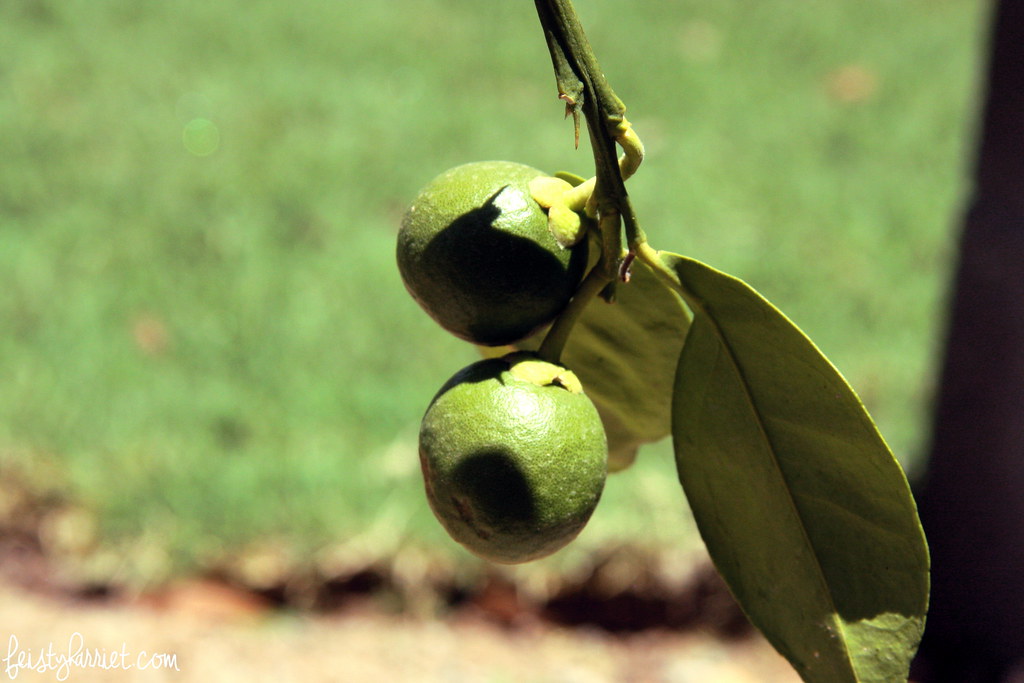
The trees went in first, a Willow Acacia on the west side to eventually shade my office window, a lime tree, pomegranate tree, and grapefruit tree. I am ridiculously excited to see tiny baby limes and grapefruits on those citrus trees! We will have a very, very small harvest this winter, like, maybe three or four grapefruits and about a dozen limes, but I am thrilled about their future! Ditto the pomegranate, which had gorgeous flowers but lost it’s fruit due to moving-stress.
 Baby grapefruits

Tiny baby limes!
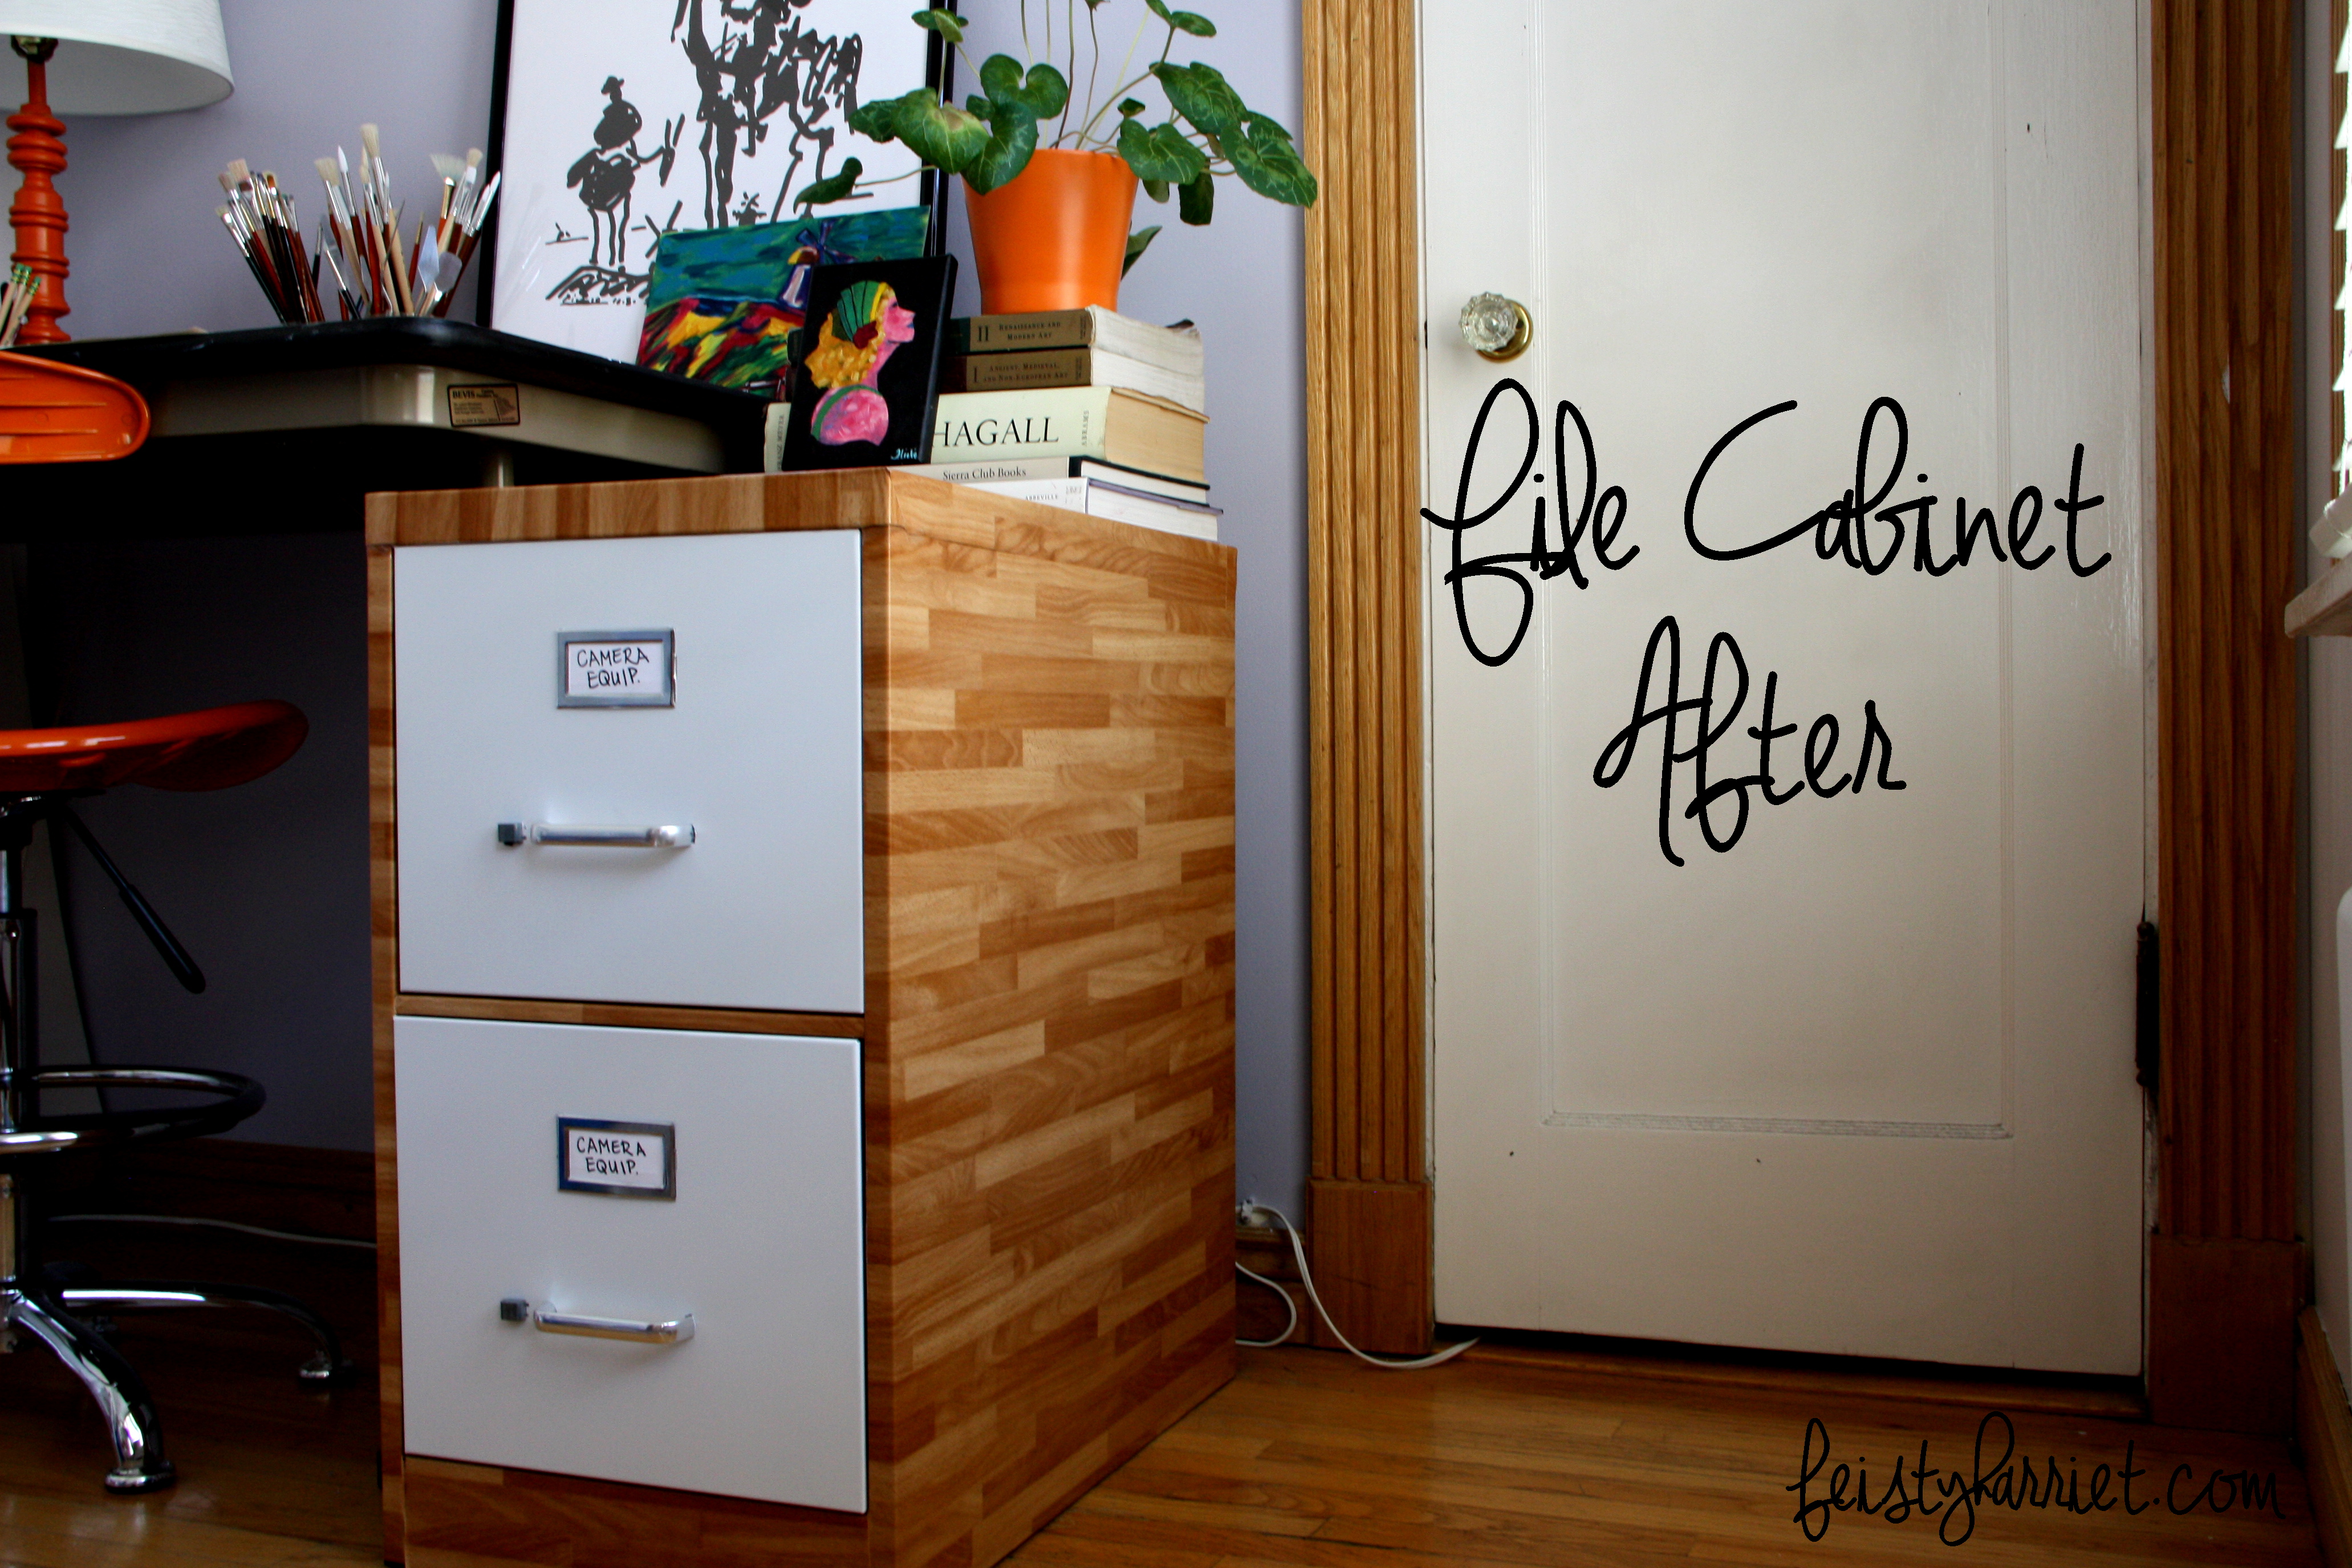
Blue Eyes spent several weekends building me a solid set of four raised garden boxes. I filled them up with seeds and veggie starts and am anxiously awaiting the day the green tomatoes are ripe and the peppers and zucchini are ready to be picked. The squash and watermelons won’t be ready until later in the summer (that is, if they don’t roast to death first). I have been picking basil, rosemary, and oregano leaves every few days to add to my kitchen experiments. Those tiny little veggies bring me a ridiculous level of happiness. We planted mid-March, but next year I think I’ll start them as seeds inside about Christmas time, there isn’t really a frost here, so I could probably plant in February and be juuuust fine. (Garden tomatoes in early May? YES PLEASE!)
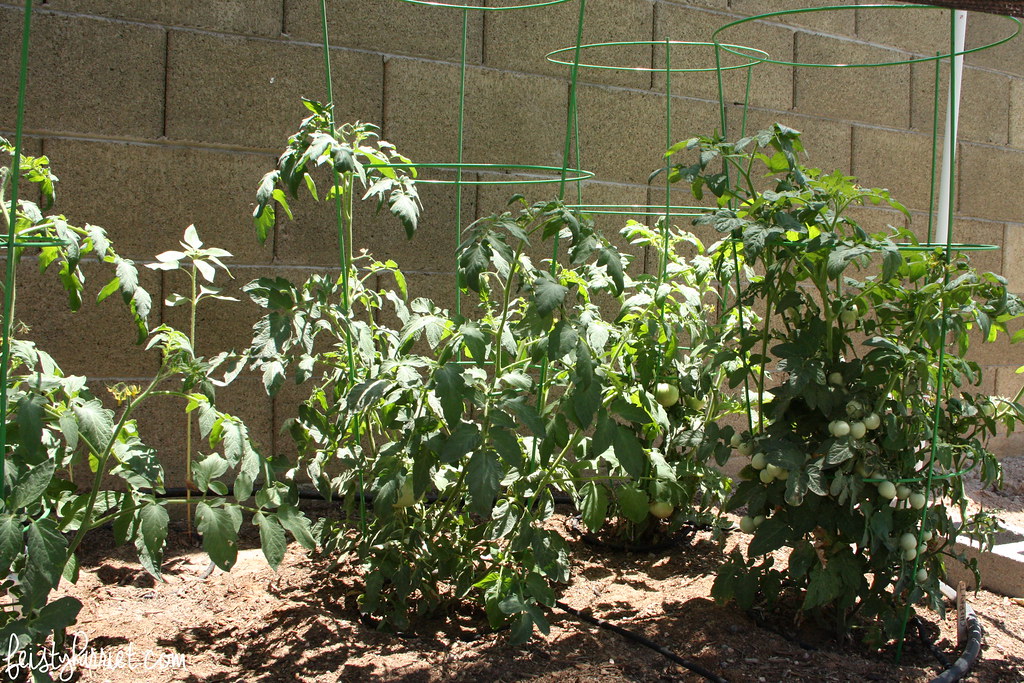 The tomato patch!
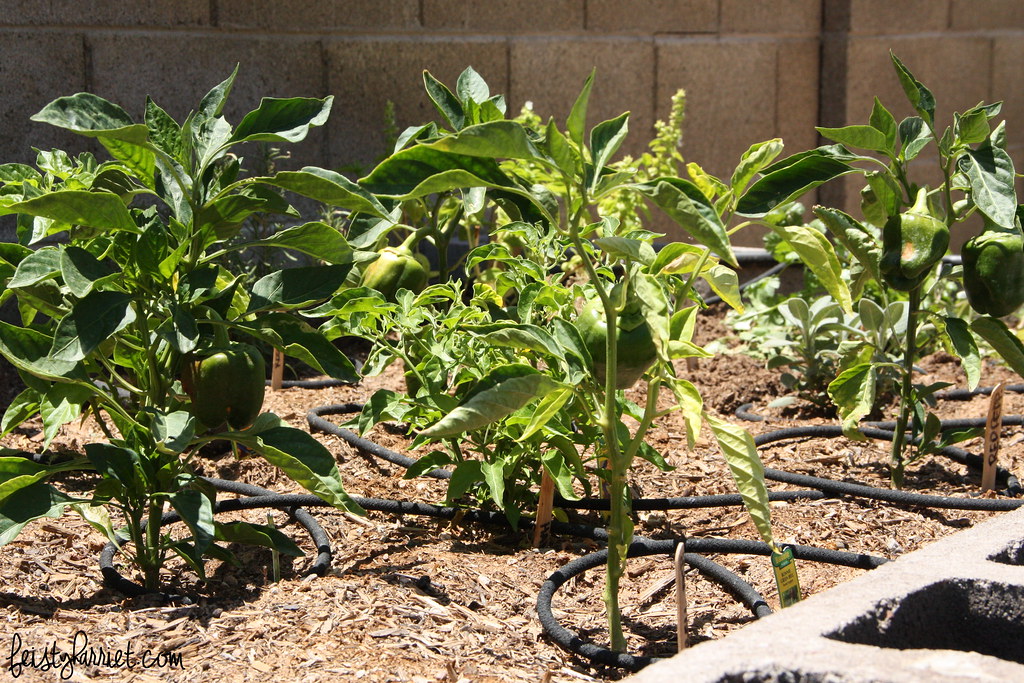 See all those bell peppers!
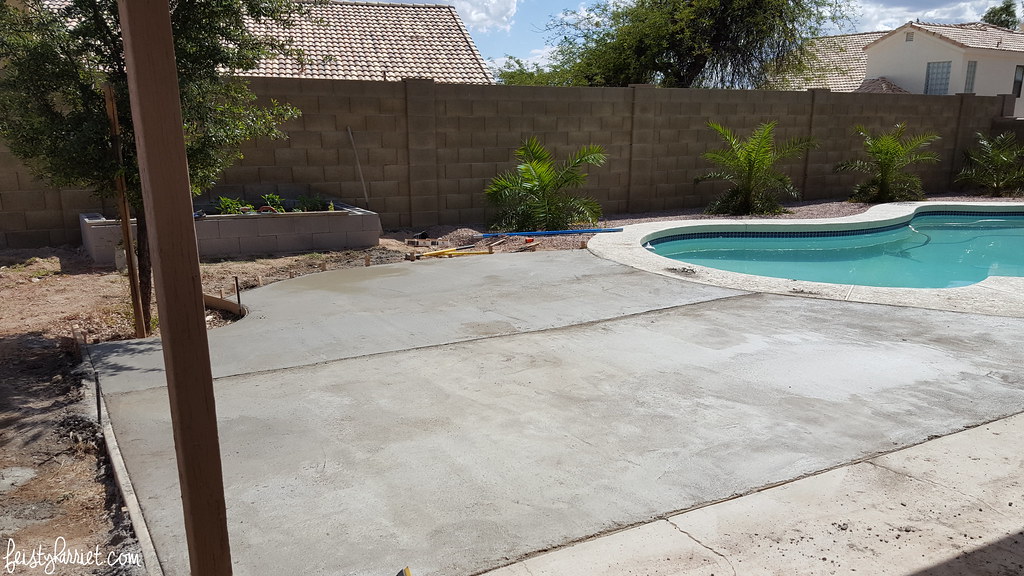
A few weeks ago we had a break in the already blistering summer heat, and with weekend temps in the 70’s and low 80’s we decided to pour the patio. Now, Blue Eyes is a civil engineer and things like “pour a concrete patio” don’t scare him. I was super nervous. It was just going to be the two of us, and the patio is….not small. As he was doing the math and adding up the number of bags of cement mix we’d need…I started to genuinely question if we shouldn’t just hire it out. Blue Eyes made a few calls, our large gate to the backyard was just a few feet too narrow to get the smallest cement mixer truck through. So, we were back to the DIY route.
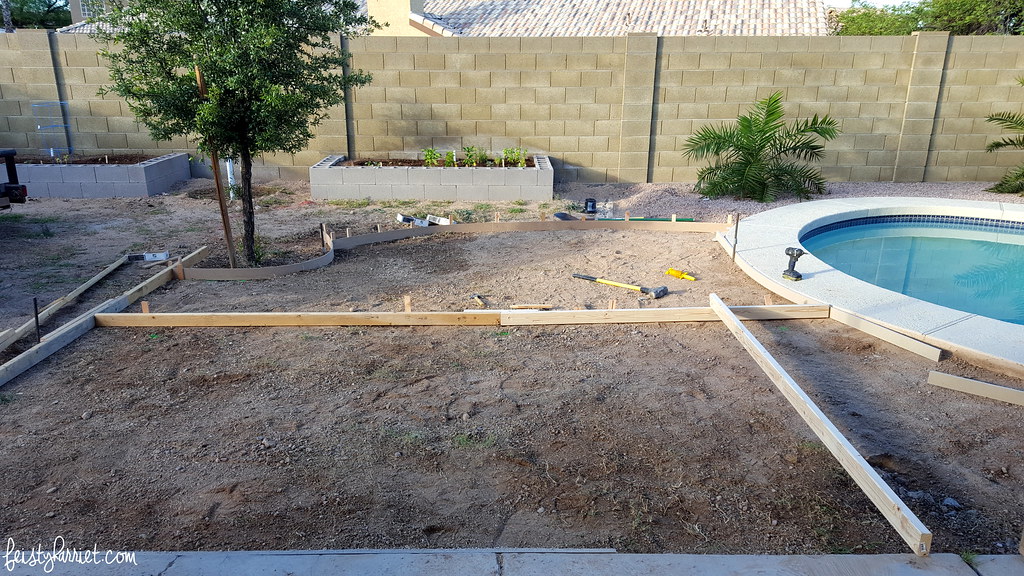
We rented the largest cement mixer Home Depot has (you need a pick-up truck to pull it) and ordered four pallets of cement mix: 60 pound bags, 56 bags per pallet = THIRTEEN THOUSAND POUNDS OF DRY CEMENT MIX! And then some. Hoooooo boy. We dug up the gravel, and the weird brick stripe in the center of the back yard, and pulled the weeds and leveled the ground as much as we could. Blue Eyes built the frame we’d use to keep the wet cement contained, and we set our alarms for ridiculously early the next morning.
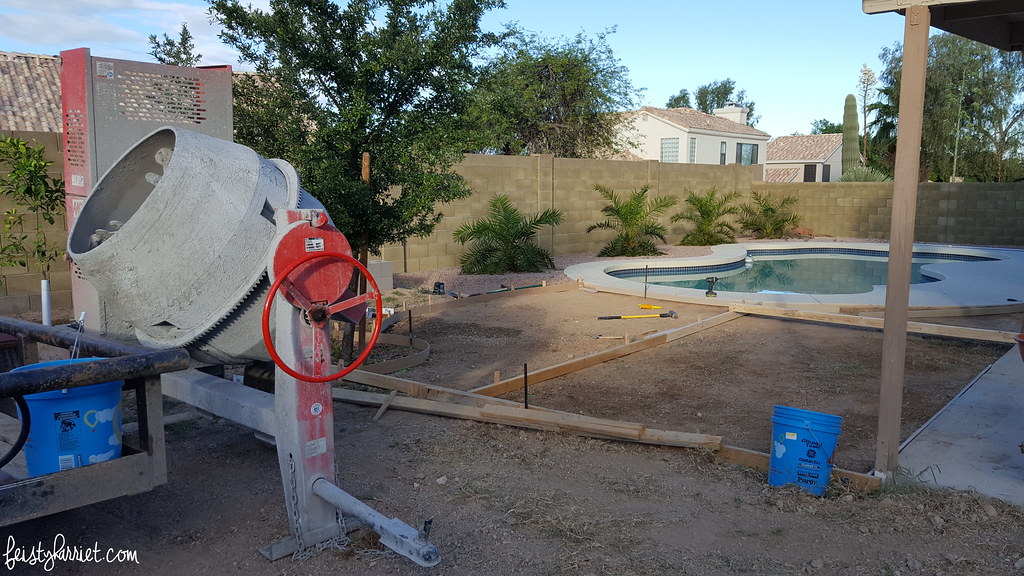
To make a batch of cement you dump two 5-gallon buckets of water into the mixer, and 13 bags of cement mix. A few minutes later it’s ready to go, you dump that mix into the wheelbarrow and trundle it over to the soon-to-be-patio. Dump, spread, smooth, repeat. And repeat. And repeat. Each batch made about three heavy wheelbarrow’s full of cement, and we made batches all damn day. ALL damn day.
Dump, spread, smooth, repeat.
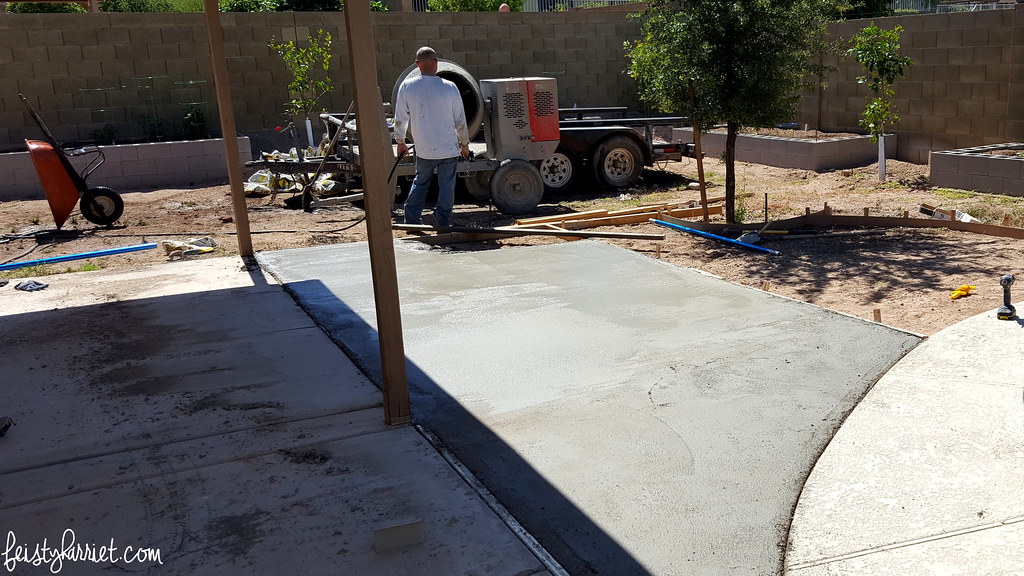
We finished up about 3:00 in the afternoon, both soaked with sweat and concrete water, flecks of cement in our hair and embedded in our skin. Truly, Blue Eyes took the brunt of the damage, I can lift a 60 pound bag, but I can’t lift it to my shoulder and dump it into a spinning cement mixer. I tried, bless me, I tried, but I nearly fell in to the mixer, or got my arms caught in the paddles, and it just…no. I hoisted and opened and filled and mixed, but Blue Eyes is the one who, literally, did most of the heavy lifting.
Our patio is not perfect, we are not professional patio pourers, but it is the exact shape I wanted, it will be lovely with big pots of flowers and some pool chairs and maybe a black and white stripey umbrella for a little more shade. I have plans for twinkly bistro lights and, after the heat of the summer, maybe one of those little fire pits and a couple of chairs.
That same week a load of sod was delivered for the rest of the backyard. Blue Eyes finished up the sprinklers and laid all the grass himself. We rigged up some shade cloth to shield the south-west facing garden beds from the Arizona sun, and my little vegetables are still going strong. (We still need to finish off those boxes, they’ll get a layer of mortar on the front so you don’t see the cinderblock seams, and finished off with flat wood planks along the top.)
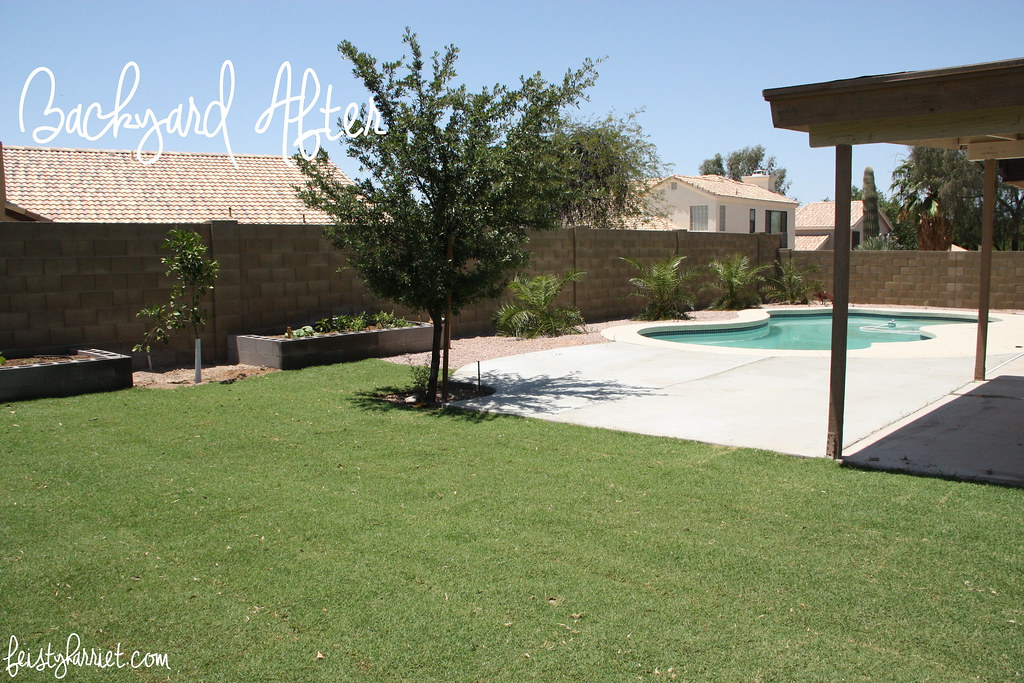
We have a real backyard! One that we can use for at least most of the year. Heavy on using the pool side during the summer/daylight hours, and the rest during the not-as-sweltering part of the year (so, November-January). I will be slowly adding more plants and pots and things, but for now? I’m going to kick back with a very cold drink and enjoy it.
Mr. Blue Eyes deserves a standing ovation and a pony ride for all his hard work. I tend to dream up mostly doable things, and he usually figures out how to make it happen. That man is a dream boat, I tell you.