Arizona Home Tour: Master Bedroom and Bathroom

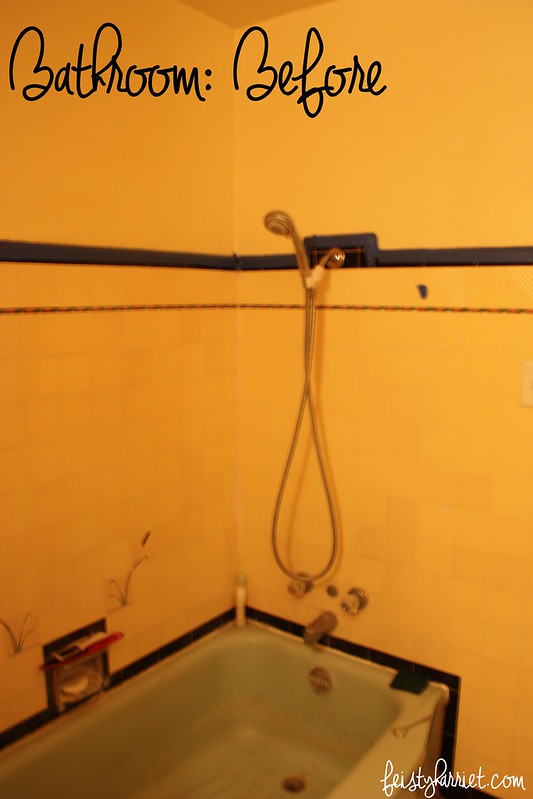
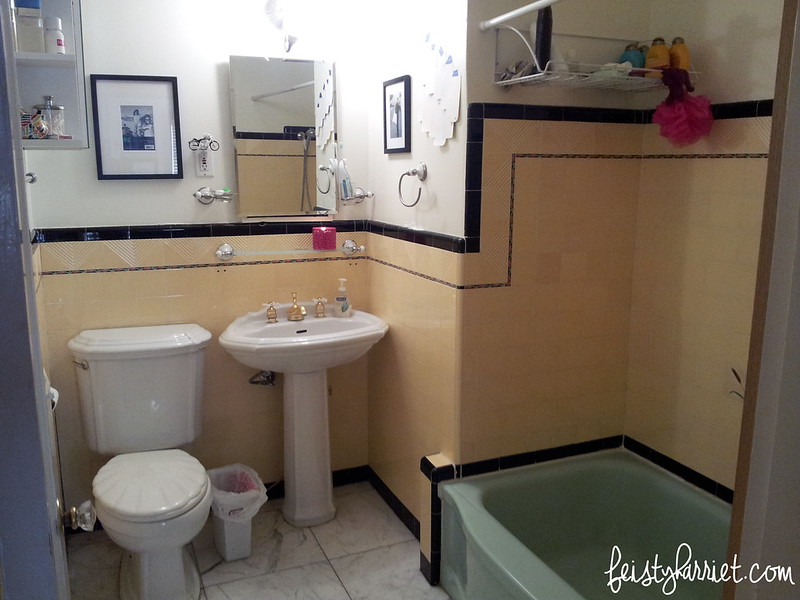
It seems like I’ve been fighting yellow-tan walls for at least a decade, and when we moved into our Arizona house that battle continued: everything was yellowy-brown. It felt like every single room was wall-to-wall cardboard, and turning on lightbulbs only exacerbated the problem. In the last year Mr. Blue Eyes and I have painted almost every single wall in our home in grays or blues and I cannot tell you how much lighter and brighter and COOLER it makes everything seem.

Arizona House Tour_Master Bedroom_feistyharriet_Sept 2016 (9)

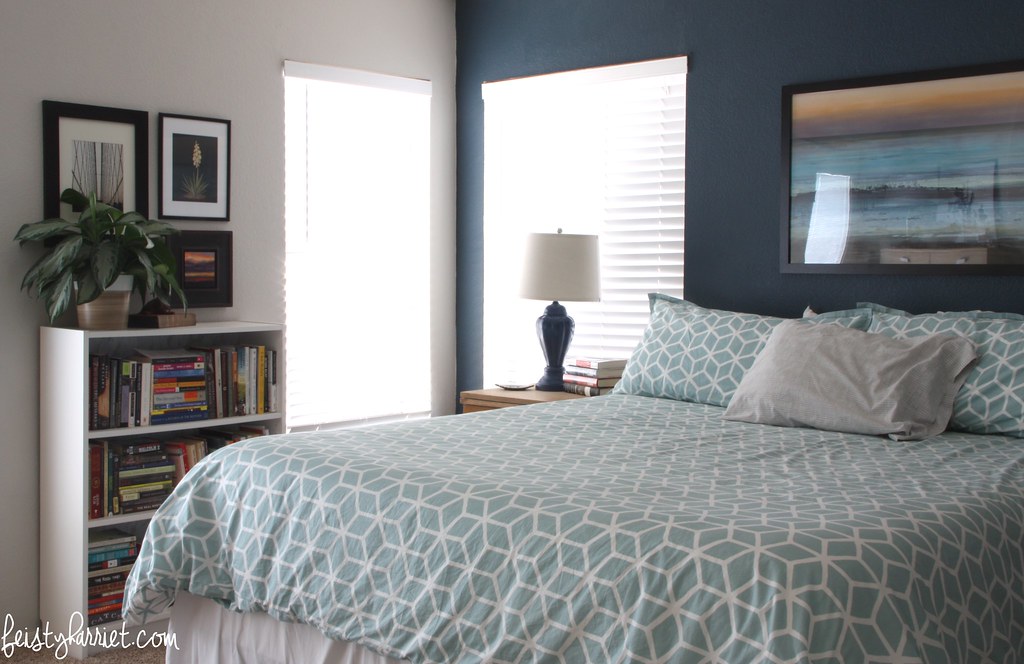
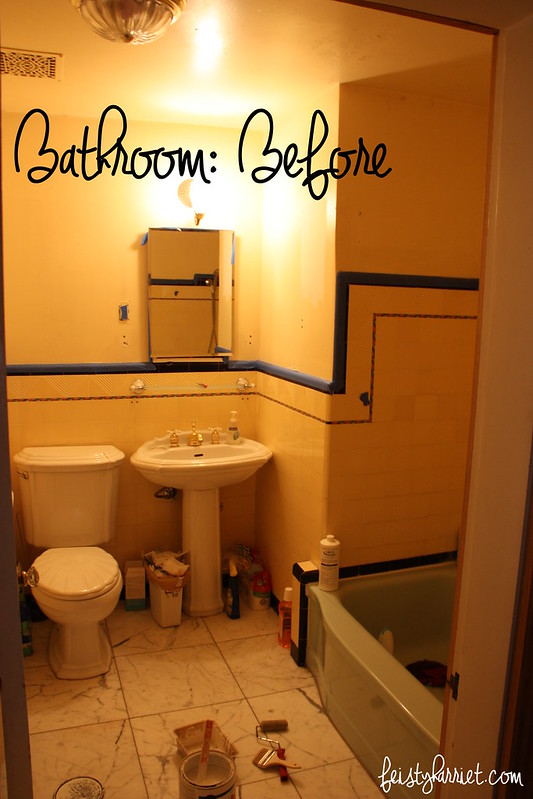
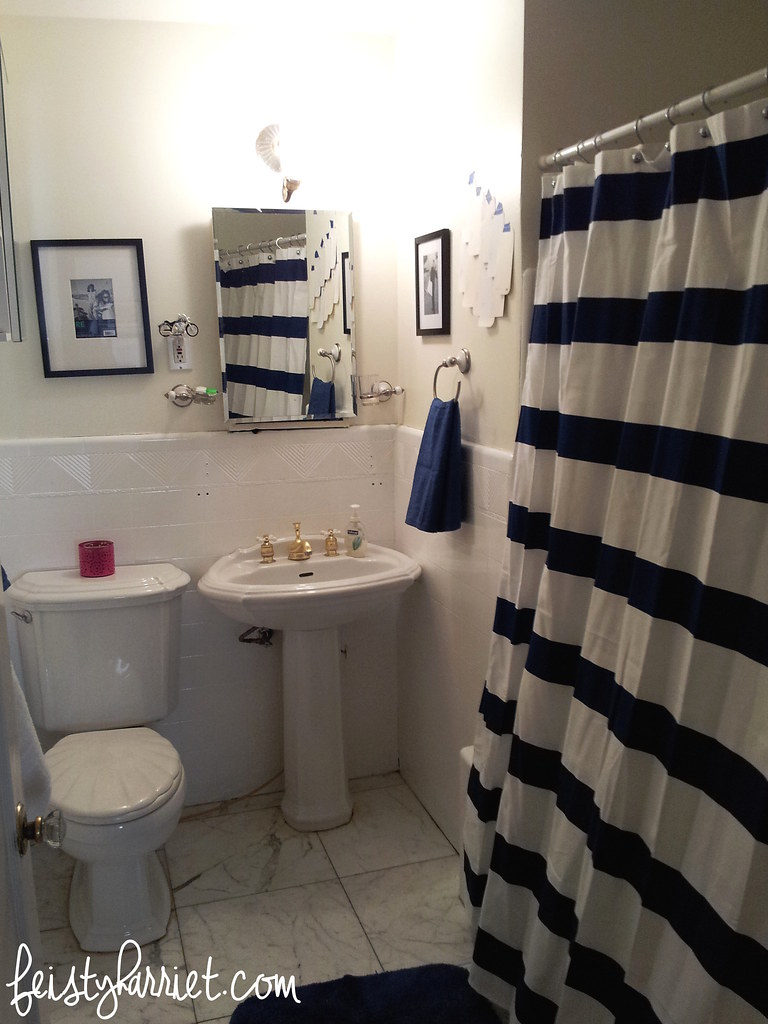
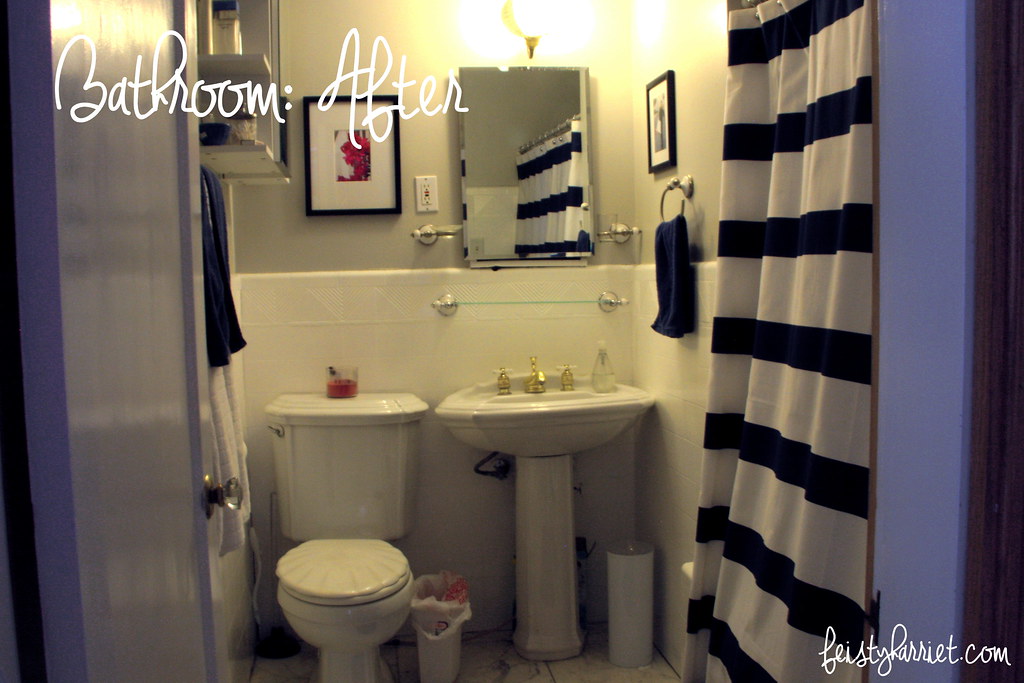
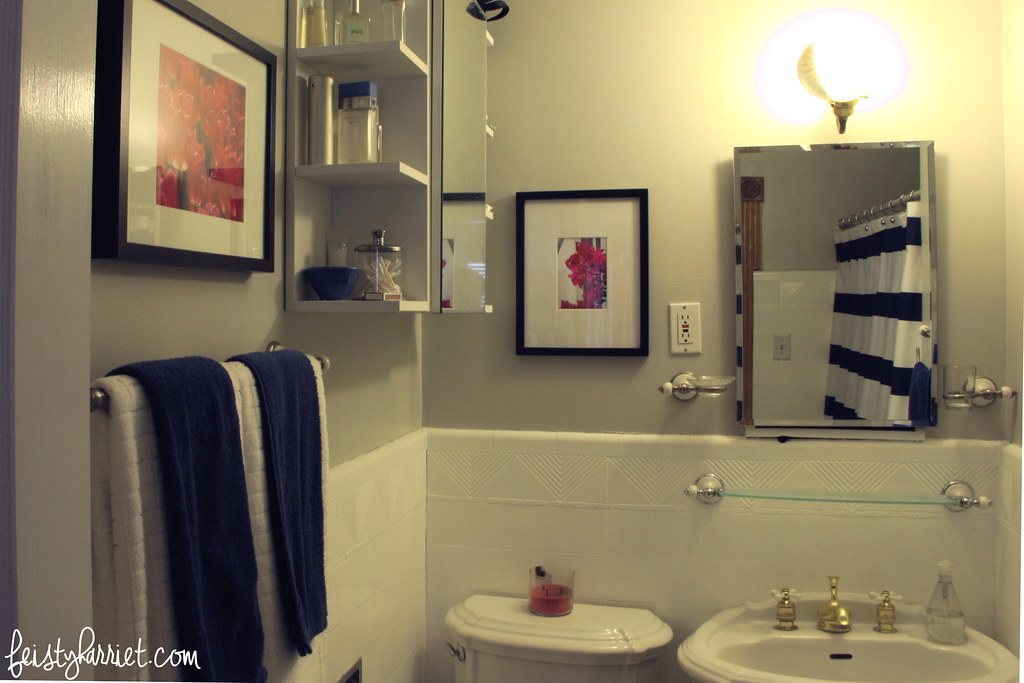
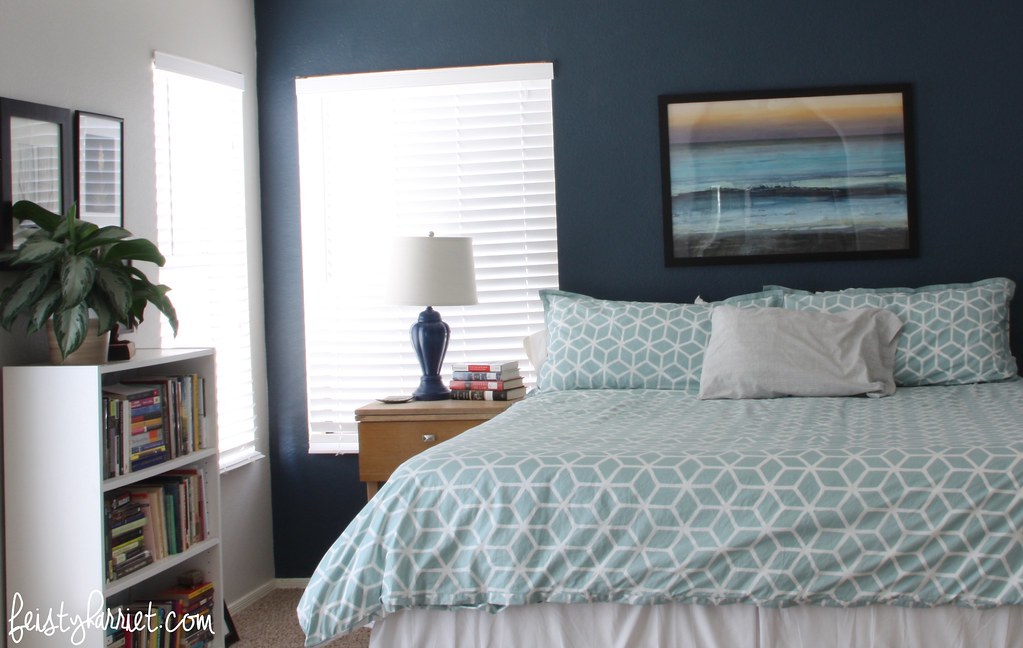
When we moved in, our bedroom consisted of yellow-tan walls and a mattress on the floor. Slowly we’ve upgraded and updated and while it’s not exactly the way I’d like it–I still have dreams of a live-edge headboard–it is SO MUCH BETTER than where we started. A California King bed and new bedding, dressers and book cases, cool gray and navy blue paint, a gallery wall of some of my favorite photographs…it truly is a whole new room. There is a large archway from our bedroom to the master bath, so everything there needed to be updated as well with grays and blues and a little bit of hot pink, because, why not.

Arizona House Tour_Master Bedroom_feistyharriet_Sept 2016 (3)

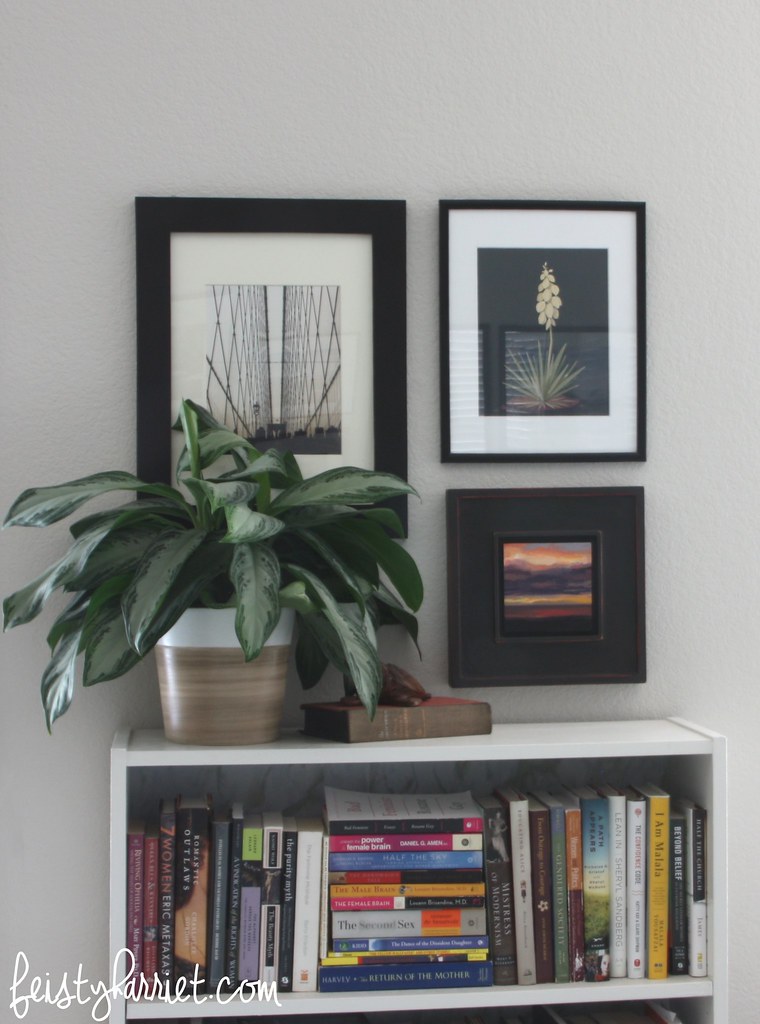
This is one of my favorite little spots in the house. I took the photo of the Brooklyn Bridge, the yucca print is from Bison Paper Company, and that gorgeous oil painting is by Cristall Harper, a gift from Blue Eyes that I love more than anything he’s ever given me.

Arizona House Tour_Master Bedroom_feistyharret_Sept 2016 (1)

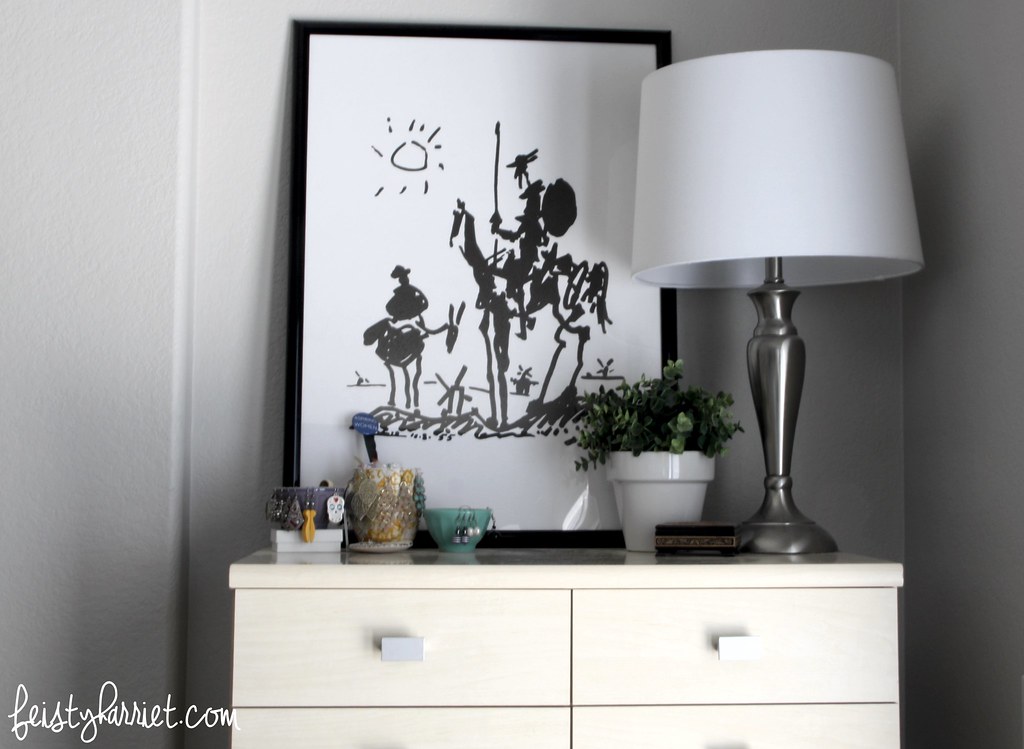
A place for all my dangly earrings, my rings are in the little cups, and Picasso’s Don Quixote. Love, love, love.

Arizona House Tour_Master Bedroom_feistyharriet_Sept 2016 (2)

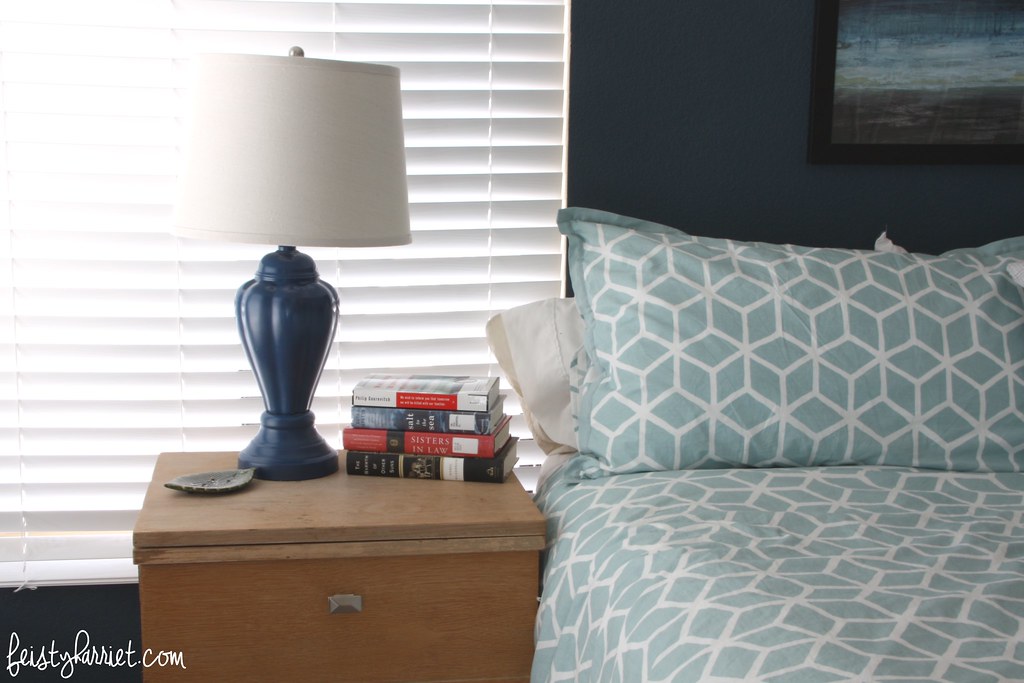
Why yes, I did move a half-dozen books off my bedside table just for the photo. Ahem.

Arizona House Tour_Master Bedroom_feistyharriet_Sept 2016 (4)

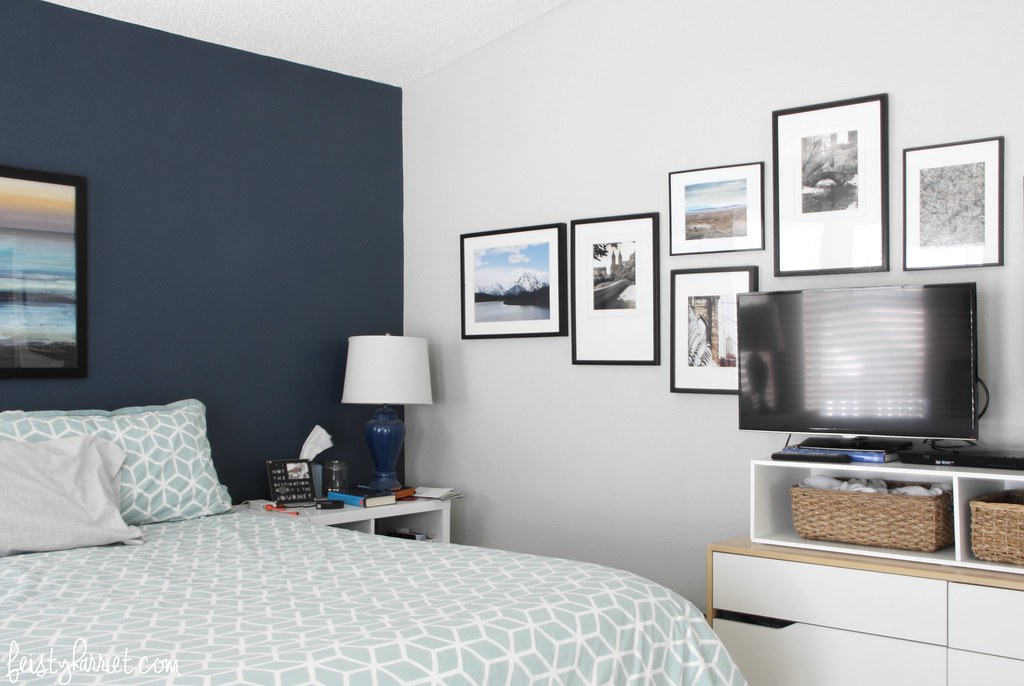
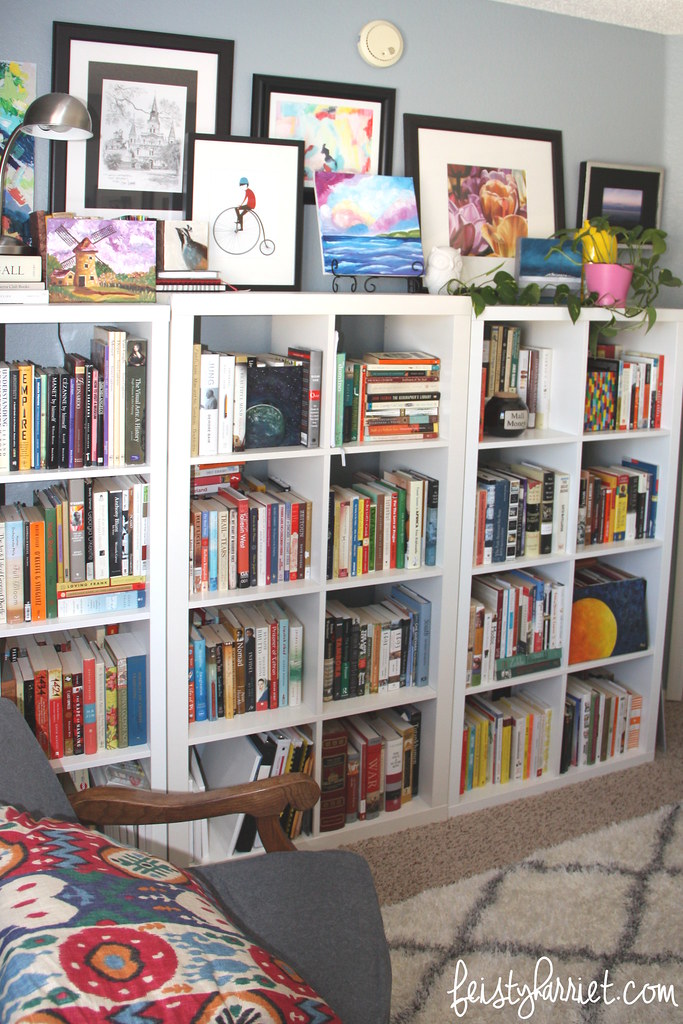
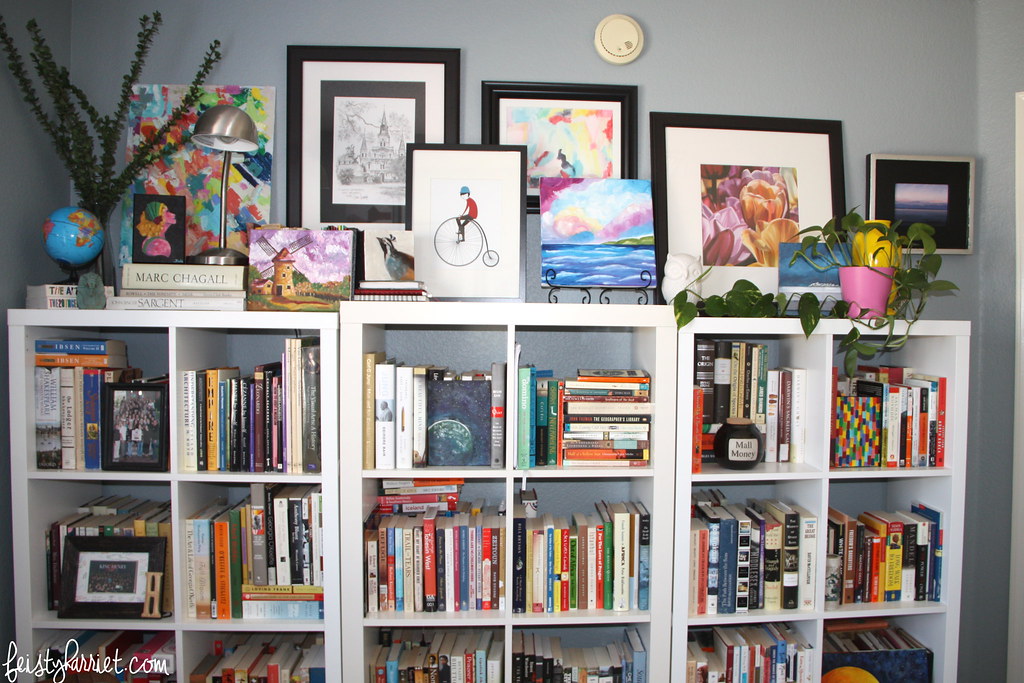
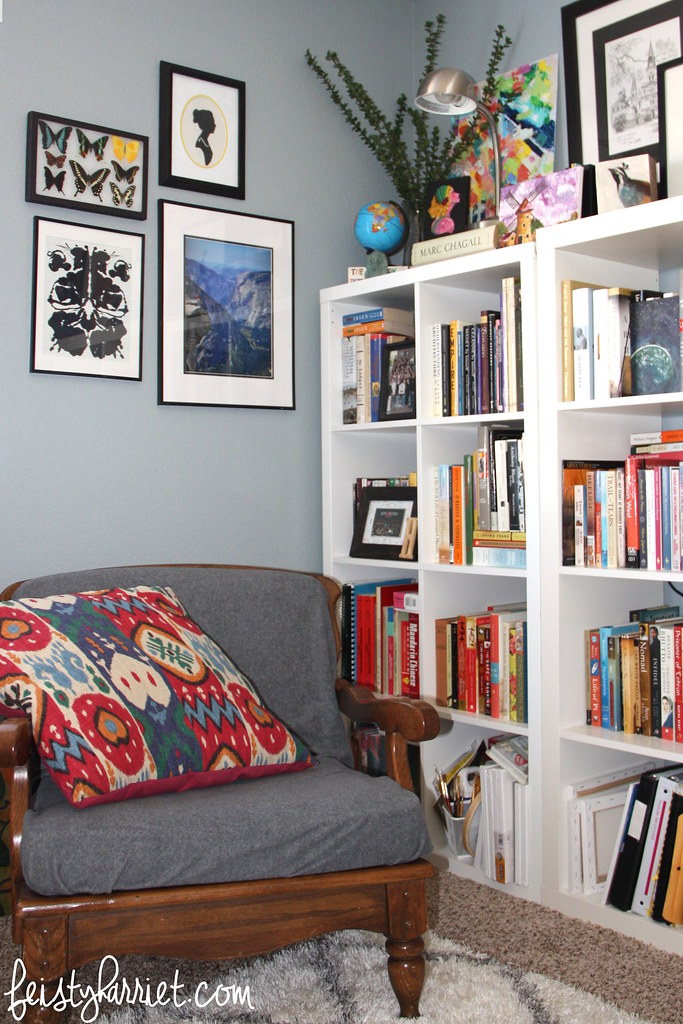
I don’t know if gallery walls are still “in” or not, but I can’t find a better solution for getting all the art that speaks to me in a place I can see it every day. I took most of those photos over the last several years, and it makes me happy to have so many memories right on my wall.

Arizona House Tour_Master Bathroom_feistyharriet_Sept 2016 (8)

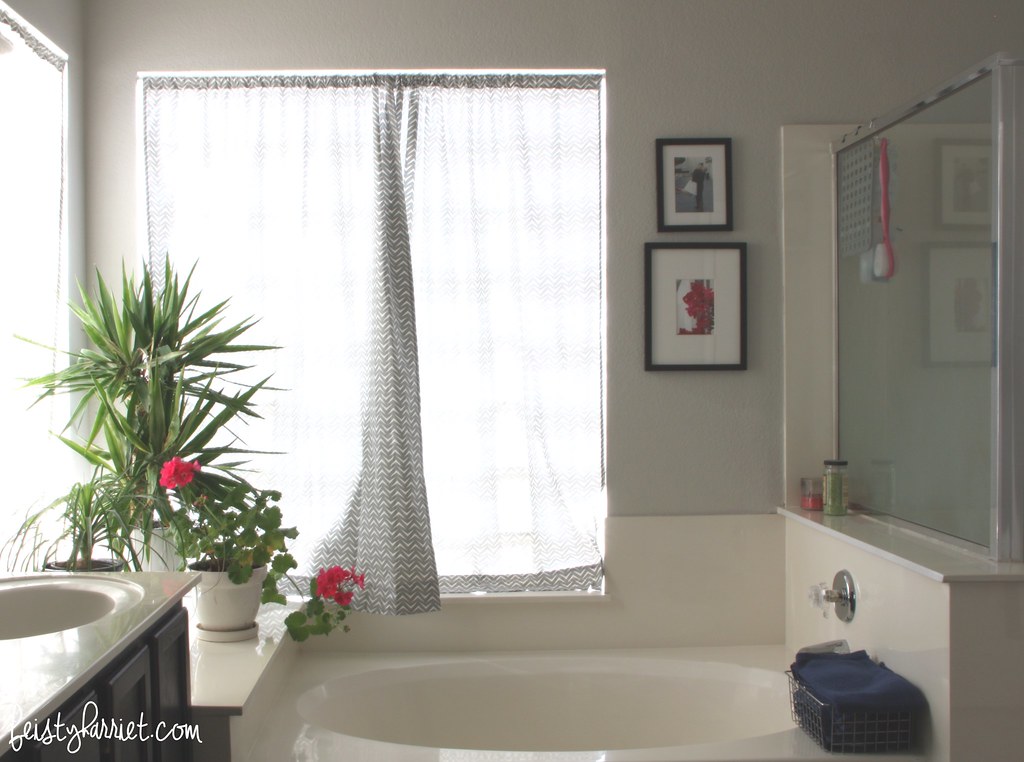
The gray walls and leafy plants make this feel almost spa-like, which makes my mornings feel a lot less oppressive (I am NOT a morning person. At all.).

Arizona House Tour_Master Bedroom_feistyharriet_Sept 2016 (6)

Part of me feels like it has taken 1,000 years to get our house transformed from yellow-tan-cardboard to something that doesn’t make my eye twitch; I keep reminding myself that I’ve lived here for 9 months, and having the vast majority of the house 90% “done” is a huge accomplishment. The other pieces will come together in time, and until then, at least I have a few little sanctuary-like spots where I can breathe.

harriet-sig

Arizona House Tour: Home Office

I have lived in Arizona for six months now and while my very first order of business upon unloading the moving truck was to set up my home office, I am only just getting around to taking photos of the almost-done version. It’s not done-done because, to be honest, I doubt any house project of mine will ever be truly finished, I’m always dreaming up new updates and changes, but at some point you’ve got to just say this is close enough and move on, right? I spent very little money on this room, like, less than $100 including paint. I am quite pleased that the leftover hodge-podge from my Salt Lake apartment translated so nicely into a completely different space and set-up here.

Arizona House Tour_Home Office_feistyharriet_June 2016 (5)

This room gets some truly lovely light due to a well-placed north-west-ish facing window, I actually have not been bothered by the lack of overhead lighting here, yet. I have some task lighting, but I rarely use it during the day. The natural light is soft and white and lovely. The before of this room was a boring builder-brown box, but a coat of pale smoke-blue paint (Flint Smoke by Behr) transformed it into a cool, soothing space. To be honest, I kind of wish I’d gone with the shade slightly mintier, but I’m not so torn up about it that I want to repaint.

Arizona House Tour_Home Office_feistyharriet_June 2016 (3)

This full-wall desktop (and dual screen set up!) has been glorious, it’s actually two IKEA table tops put together, one trimmed slightly to fit the space. I wish they were purchased at the same time and were actually the same color, but I wasn’t willing to throw the perfectly acceptable, 2-years-old version out and then pony up another $60 for the EXACT same thing. I use the left side for my work and writing, the right side (a bit smaller) is my little painting space with some storage underneath for files and paperclips, camera equipment and painting supplies. I had all the artwork already, it was just a matter of pulling the most fun, brightest pieces from my stash and getting them arranged into a gallery wall. I clearly am still missing some pieces, that Target frame definitely needs a photo in it and the blank canvas on the right could probably use a little paint. But! I love that these are the images I look at every day: a big Matisse (left), a few of my own paintings and photos, a Picasso print (black/white portrait in the middle) that could have been based on my profile, Andy Warhol’s butterflies, and a few family snapshots.

Arizona House Tour_Home Office_feistyharriet_June 2016 (1)

The opposite wall from my desk is all bookshelves, most layered two rows deep of novels and non-fiction on my favorite subjects. I had these Expedit/Kallax shelves from IKEA in my Salt Lake apartment, which is why they don’t all match either. (I’m trying really hard not to be bothered by the 1″ taller center section and just go with it, but honestly, it sometimes really bugs me.) The art on top was also pulled from my collection, some prints, some original oil paintings (by me or legit artists), one watercolor done by my niece when she was 3, all in the bright colors I wanted for this room.

Arizona House Tour_Home Office_feistyharriet_June 2016 (4)

That chair is from my grandparents and is ridiculously comfortable. One day I will actually take the time/money to recover the mustard-yellow cushions instead of tuck a gray fleece blanket around them, but today is not that day. A big pillow and this little corner turns into my most favorite research spot during the day, and reading corner at night (with appropriate task lighting). A diamond-print fuzzy rug covers up almost all of the brown carpet, which one day will be replaced by something….less brown.

And there you have it, the 80 square feet where I spent the vast majority of my time. I have never actually gone to a coffee shop or library to work, most of my day-to-day projects revolve around document creation and data research, and that is just SO much easier to do on a dual-screen than a single, tiny, laptop screen. In fact, I have difficulty functioning when I have to use my laptop screen only to work, I guess I’m super spoiled with the two big monitors to move windows/spreadsheets around and check and triple check facts and figures as I create documents and write reports.

A few words on working from home: Six months ago I started working remotely for my company. In some ways, working from home has been absolutely fantastic, but in others it has been really, really hard. I have been really careful to maintain regular “office” hours, to get up and get dressed and “go to work.” I take a mid-morning break for 10 or 15 minutes, a solid hour for lunch, and another 10 minutes in the afternoon to do some stretches or make a smoothie  milkshake  smoothie, or whatever, but for the most part, I am at my desk during regular business hours, just like I would in my office in Salt Lake. I don’t work from my bed, or the couch, nor do I stream Netflix on the side. In that respect, actually, working remotely hasn’t bee that different than being in my corporate office, I just wear fuzzy slippers a lot more often. The functions of my day-to-day job are easily accomplished via a remote situation, but I miss being in an office, I miss the in-person interactions with my co-workers, I feel like I am losing out on a lot of spur-of-the-moment projects and initiative, and I spend the vast majority of my time completely alone. That part really really sucks. Yes, we have conference calls and video chat and instant messaging and a variety of social media channels where I can connect with some of my more favorite coworkers, the ones who really are personal friends at this point, not just colleagues, but for me, it’s just not the same.

I also feel like I should point out that I am missing out on the opportunity to find and make work-place friends or meet colleagues, and that has been hard too. When you work 700 miles from your co-workers, but are not at all in an industry that translates across state borders (I work for a state agency, my colleagues are ALL state employees in other Utah agencies in some way, very few are outside of state government or administration), how do you make work friends? It’s been a lot harder on me than I thought, not having a group of friends nearby.

Do you work from home? Do you have a dedicated office space? Are there any tips I should definitely know about that seem to be missing in my working-remotely situation?

Harriet sig

Apartment Update: Bathroom Before and After

When I first moved in to my apartment almost 10 years ago (!!) I loved the bright cheery yellow walls. It was a short-lived love which after a year or two turned into some version of apathy, and then loathing. I have ranted about how much I grew to hate the yellowish walls in my apartment, and in no room was the yellow more hated than the tiny, windowless bathroom. I mean, the yellow walls would have grown tiresome with bright white subway tile after a few years. Pair yellow paint with a yellow ceiling and yellow tiled walls (with black and orange trim, to boot) and taking a shower in the MINT GREEN tub surrounded by all things yellow felt a lot like being crushed in an inverted school bus. No, I am not exaggerating. Please note, there is no fancy camera settings to enhance the yellowness, nor did I use some 70’s Instagram filter. With yellow walls and ceiling and tile, this is just what the inside of my bathroom looked like, when a bulb reflects light off a yellow ceiling that then bounces off yellow walls, you have freaking yellow dengue fever trapped inside one little room. I forgot to take pics until I had already taped off the walls to prime them, but even imagining away the blue painter’s tape doesn’t improve this view.

Bathroom Before_feistyharriet_2

Bathroom Before_feistyharriet_3

Please note the yellow tile with black trim and a thin stripe of black/orange floral detail. Please note the mint green tub. Please note the “decorative” CAT TAILS tiles in the shower. Please also note the pretty awesome marble tile floor that is completely lost in a sea of yellow everything.

I did a lot of research to see what I could do about the tile. It was in good shape, not original to the building (just to a 1960’s “upgrade”), but there was SO MUCH YELLOW. I finally stumbled across this post about refinishing tile. I did some more research, priced out the whole thing, and sent a proposal to my landlord, fingers crossed. This is the same landlord who up until this point had refused to even allow me to paint walls because they had a “look” and “image” they wanted to maintain…um, yes. “Hello, welcome to your new home, we specialize in yellow death.”

A few days later I had the go-ahead to completely change the look of the bathroom!! After washing walls and ceiling down twice, I rolled on a coat of Killz primer paint. Even just that one little change and removal of yellow made SUCH a huge difference! (I should note, while I purchased the tile refinisher stuff on Amazon, and despite it’s Prime status it is not a quick ship item, I waited about a week to get it and in the meantime had to use my bathroom and stuff, hence this half-done photo.)

Bathroom During_feistyharriet_4

Again, no special post-photo treatment. Just having white walls and ceiling made this bathroom immediately brighten up by ten million degrees. There are no windows in here, so it’s not like I cheated and used some pretty natural sunlight to make the “after” more dramatic. And also, this isn’t the After shot, this is just after a couple hours of patching walls, priming, and figuring out where I was going to hang some artwork.

I won’t go into a tutorial of how to refinish the tile, because this post does all of that already with great pics and action shots and all sorts of good stuff. I will just say that you must scrub the heck out of those tiles first to make sure they are extra clean (do you see how shiny and squeaky-clean they are in that picture above?), and you definitely want a serious gas mask (I think mine was $30 or so on Amazon) because this epoxy-ceramic finish stuff stinks to high heaven. Seriously, I couldn’t spend the night in our apartment and had to seek refuge at a friend’s house.

Bathroom During_feistyharriet_5

Next up was three coats of Rust-Oleum Tub and Tile Refinishing Kit to get enough coverage for a clean white finish, especially over the textured tiles and the black trim. I used a whole box per coat because I had so much square footage of yellow tile, if you are refinishing a smaller area you could probably get away with less. Warning, read those instructions VERY carefully, wear a serious fumigating mask, and be prepared to spend a day or two far, far away from your tile as it cures. That stuff is STANKY! A little clean up with some acetone and a razor blade, plus a fresh coat of caulk everywhere and the smelly part was done! I kept the ceiling bright white, but ended up painting the walls a beautiful medium gray, Smooth Stone by Glidden. Honestly, the white walls made it a little too bright in there for early mornings. I added some white towels (IKEA), a new shower curtain and pink candle holder (Target), and a couple of photos of hot pink flowers, and blam-o! MASSIVE IMPROVEMENT! I have a completely new bathroom for under $150 dollars. No, that’s not a typo: $150 for supplies, paint, towels and accessories. I still can’t stop swooning at these after photos.

Bathroom During_feistyharriet_1

The tile is white! I repeat: THE TILE IS WHITE!!! The minty green tub suddenly seems trendy-mint instead of a bad bargain on bathroom fixtures circa 1963. The finish is remarkably ceramic-like and, after 18 months of two to three showers per day (average, don’t ask) and zero ventilation in the room there are no signs of this stuff flaking or rubbing off. It’s a freaking miracle. A white tile miracle. The photo above was before I painted the walls gray, the white walls were just too bright and–OCD alert–didn’t match the new white tile very well. So, a coat of gray paint later, this is what I had.

Bathroom After_feistyharriet_1

Bathroom After_feistyharriet_2

(Yes, I am posting this makeover DIY project AFTER I actually moved out of said apartment. Timeliness is not really my jam, okay?)

Harriet sig

A Tale of Two File Cabinets: A DIY Success

I live in a very spacious apartment and have lived here for a decade, these two things have combined into a remarkable collection of stuff. Now, I like my stuff, not all stuff, but my stuff. I get a measure of happiness from a shelf full of books or a closet full of clothes or shoes that I love, or a stack of adorable salad plates just because they are more fun than regular white ones. That being said, the combination of not moving and not running out of space has led to MANY MANY shelves of books, an almost obscene number of shoes, and more stacks of plates than any one person really needs. I am not apologizing and I will not be ditching everything to live in a Tiny House with an e-reader, a spork and multi-use dish, and only two pairs of underwear. However, over the last few months I have been slowly weeding out my collections and donating, recycling, or giving away things I have no use for and/or will not fit into the Arizona house. Some of this has been really hard and left me in a sobbing heap on the floor. Other times the cleaning out and tidying up has been invigorating.

Over the years I’ve collected a number of small tables and side chairs, some from thrift stores, many as donations from friends or relatives, and a few that I picked up off the side of the road, clean up, and use on a regular basis. Two such items are small two-drawer file cabinets, one a donation and one a thrift store find. In a spurt of genius and productivity I tackled both with some serious DIY juju and the results were far better than I had anticipated.

Metal File Cabinet DIY:
New Paint and Patterned Contact Paper

Metal file cabinet DIY_feistyharriet_July 2015 (1)

My Dad had this laying around his basement and while I was doing some rearranging after Blue Eyes moved to Arizona I thought I could use it to house my growing collection of camera equipment (lenses, lights, tripod, monopod, cases, tubes, extra bulbs, cleaning equipment, a few books, etc.). This cabinet was in good working condition, but was pretty rough. I scrubbed it twice and scraped off the stickers and wiped it all down one last time with acetone. I pulled the drawers out, figured out how to take off the label plates, and taped off the handles before I sprayed the drawer-fronts with a coat of primer and then two coats of white from my stash of spray paint. I found some pretty butcher block contact paper on Amazon and carefully cut it to cover the frame of the file cabinet. I used some strong clear tape on the edges to make sure nothing peeled up and tried to keep everything as straight as possible.
Metal File Cainet DIY_feistyharriet_July 2015 (4)

Metal File Cainet DIY_feistyharriet_July 2015 (3)

Ta-daaaaah! For $11.00 in contact paper I have something pretty and clean and modern-looking. I’m sure you could spray-paint the whole thing, but to be honest it seemed easier to just order some contact paper for the body of the cabinet instead of lugging the whole thing down a flight-and-a-half of stairs and then all the way back up.

Wood File Cabinet DIY:
New Paint and Awesome Hardware

Wood file cabinet DIY_feistyharriet_July 2015 (2)

I found this at a thrift store twelve years ago for probably $5 dollars and at the time I was a poor starving college student who needed a bedside table that would double as storage for my socks and underwear. This was narrow enough for my tiny, shared bedroom and the insides of the drawers were super clean. Sold. Ahem…that was twelve years ago, and other than a little dusting here and there this has remained unchanged ever since.

I unscrewed the drawer handles and sanded everything with 150-grit sand paper, I wanted to scrape off the top layer of the shiny veneer so the paint would stick. After wiping everything down twice to remove any extra dust I used several thin coats of this gorgeous deep red paint/primer combo I had leftover from another project. It took about three coats to fully cover the veneer and I added another one just in case. After a lot of deliberating on how much of a splash I wanted to make with hardware I ordered these chunky hexagon Chinese door knockers and a few packages of brassy corner plates.  As soon as I saw the hardware in person I knew I had made the right choice in those hefty pulls: go big or go home! My friend B. had to drill me a new hole for the hardware and I came home, drilled drawers in tow, and promptly ordered my very own cordless drill. The paint made a huge difference, but after screwing in the handles and adding the corner plates I was speechless and completely in love.
Wood File Cabinet DIY Chinese Hardware_feistyharriet_July 2015 (1)

Wood File Cabinet DIY Chinese Hardware_feistyharriet_July 2015 (2)

Hello! Look at them knockers!! I still think I need to pull the casters off, but for now it’s nice to be able to roll this around instead of scraping it along my hardwood floors or hefting the whole thing with my puny arms.

Each of these projects was a single evening of happy painting or papering. Amazing what a little imagination and elbow grease can do, right? And kick-ass hardware improves everything. EVERYTHING.

Harriet sig